
How to Install Kubernetes on Ubuntu 18.04
Prerequisites
- 2 or more Linux servers running Ubuntu 18.04
- Access to a user account on each system with sudo or root privileges
- The apt package manager, included by default
- Command-line/terminal window (Ctrl–Alt–T)
Steps to Install Kubernetes on Ubuntu
Set up Docker
Step 1: Install Docker
Kubernetes requires an existing Docker installation. If you already have Docker installed, skip ahead to Step 2.
If you do not have Kubernetes, install it by following these steps:
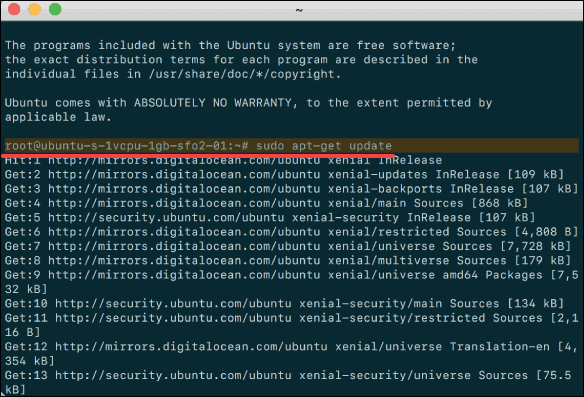
1. Update the package list with the command:
sudo apt-get update
2. Next, install Docker with the command:
sudo apt-get install docker.io
3. Repeat the process on each server that will act as a node.
4. Check the installation (and version) by entering the following:
docker ––version

Step 2: Start and Enable Docker
1. Set Docker to launch at boot by entering the following:
sudo systemctl enable docker

2. Verify Docker is running:
sudo systemctl status docker

To start Docker if it’s not running:
sudo systemctl start docker

3. Repeat on all the other nodes.
Install Kubernetes
Step 3: Add Kubernetes Signing Key
Since you are downloading Kubernetes from a non-standard repository, it is essential to ensure that the software is authentic. This is done by adding a signing key.
1. Enter the following to add a signing key:
curl -s https://packages.cloud.google.com/apt/doc/apt-key.gpg | sudo apt-key addIf you get an error thatcurlis not installed, install it with:
sudo apt-get install curl

2. Then repeat the previous command to install the signing keys. Repeat for each server node.
Step 4: Add Software Repositories
Kubernetes is not included in the default repositories. To add them, enter the following:
sudo apt-add-repository "deb http://apt.kubernetes.io/ kubernetes-xenial main"

Repeat on each server node.
Step 5: Kubernetes Installation Tools
Kubeadm (Kubernetes Admin) is a tool that helps initialize a cluster. It fast-tracks setup by using community-sourced best practices. Kubelet is the work package, which runs on every node and starts containers. The tool gives you command-line access to clusters.
1. Install Kubernetes tools with the command:
sudo apt-get install kubeadm kubelet kubectlsudo apt-mark hold kubeadm kubelet kubectlAllow the process to complete.
2. Verify the installation with:
kubeadm version

3. Repeat for each server node.
Step 6: Begin Kubernetes Deployment
Start by disabling the swap memory on each server:
sudo swapoff –a

Step 7: Assign Unique Hostname for Each Server Node
Decide which server to set as the master node. Then enter the command:
sudo hostnamectl set-hostname master-node

Next, set a worker node hostname by entering the following on the worker server:
sudo hostnamectl set-hostname worker01

If you have additional worker nodes, use this process to set a unique hostname on each.
Step 8: Initialize Kubernetes on Master Node
Switch to the master server node, and enter the following:
sudo kubeadm init --pod-network-cidr=10.244.0.0/16Once this command finishes, it will display akubeadm joinmessage at the end. Make a note of the whole entry. This will be used to join the worker nodes to the cluster.
Next, enter the following to create a directory for the cluster:
kubernetes-master:~$ mkdir -p $HOME/.kube kubernetes-master:~$ sudo cp -i /etc/kubernetes/admin.conf $HOME/.kube/configkubernetes-master:~$ sudo chown $(id -u):$(id -g) $HOME/.kube/configStep 9: Deploy Pod Network to Cluster
A Pod Network is a way to allow communication between different nodes in the cluster. This tutorial uses the flannel virtual network.
Enter the following:
sudo kubectl apply -f https://raw.githubusercontent.com/coreos/flannel/master/Documentation/kube-flannel.yml

Allow the process to complete.
Verify that everything is running and communicating:
kubectl get pods --all-namespaces

Step 10: Join Worker Node to Cluster
As indicated in Step 7, you can enter the kubeadm join command on each worker node to connect it to the cluster.
Switch to the worker01 system and enter the command you noted from Step 7:
kubeadm join --discovery-token abcdef.1234567890abcdef --discovery-token-ca-cert-hash sha256:1234..cdef 1.2.3.4:6443
Replace the alphanumeric codes with those from your master server. Repeat for each worker node on the cluster. Wait a few minutes; then you can check the status of the nodes.
Switch to the master server, and enter:
kubectl get nodes

The system should display the worker nodes that you joined to the cluster.
Conclusion
After following the steps mentioned in this article carefully, you should now have Kubernetes installed on Ubuntu.
For beginners who still have no experience of deploying multiple containers, Minikube is a great way to start. Minikube is a system for running a single node cluster locally and is excellent for learning the basics, before moving on to Kubernetes.
This network uses multiple servers to communicate back and forth. Kubernetes allows you to launch and manage Docker containers across multiple servers in the pod.
